How to create new Order, Dispatch and Invoice:
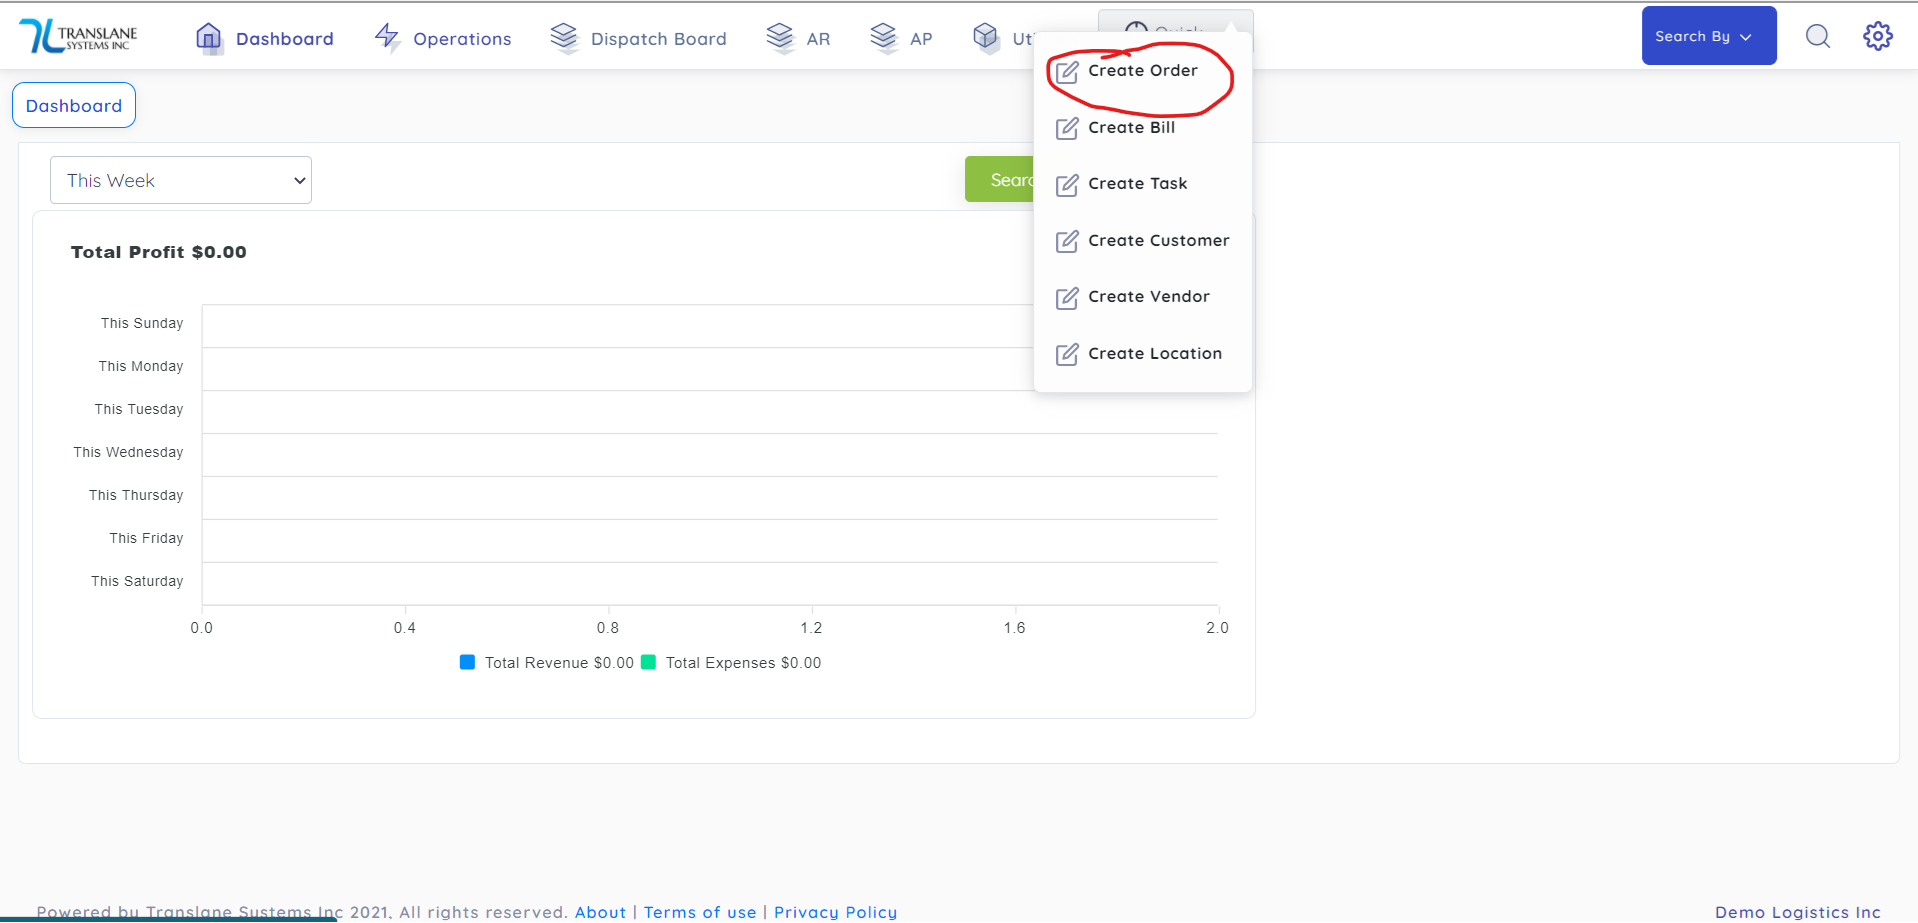
Order can be create from two places:
One from Quick on top menu
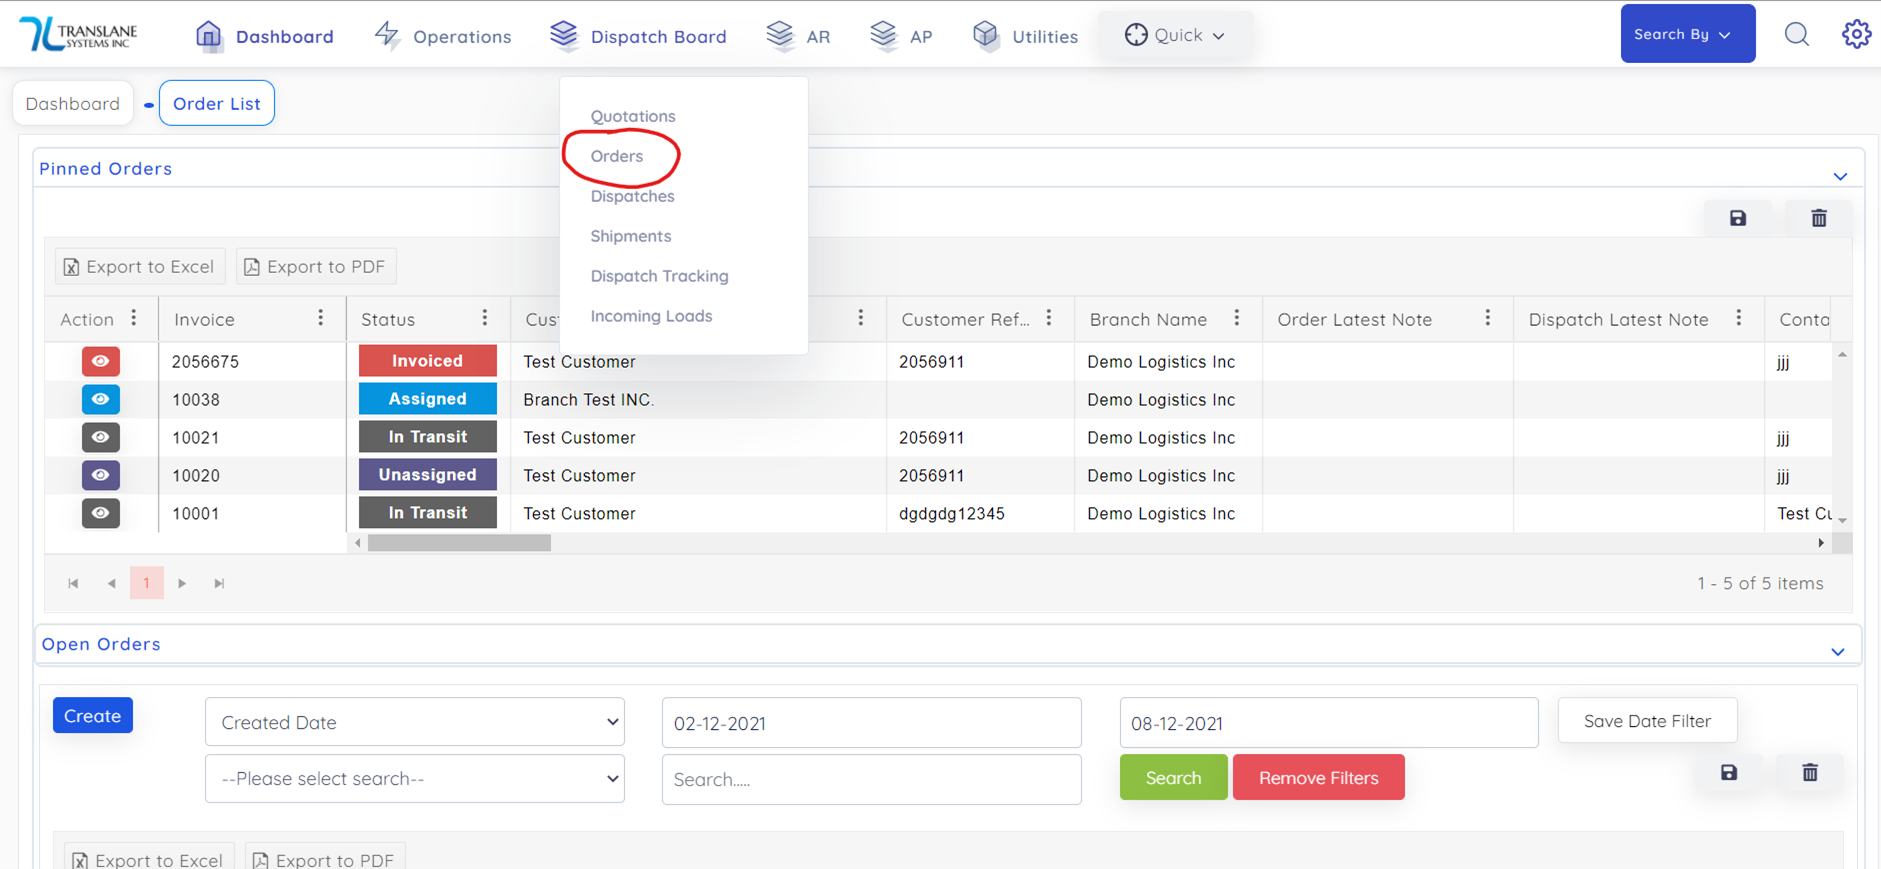
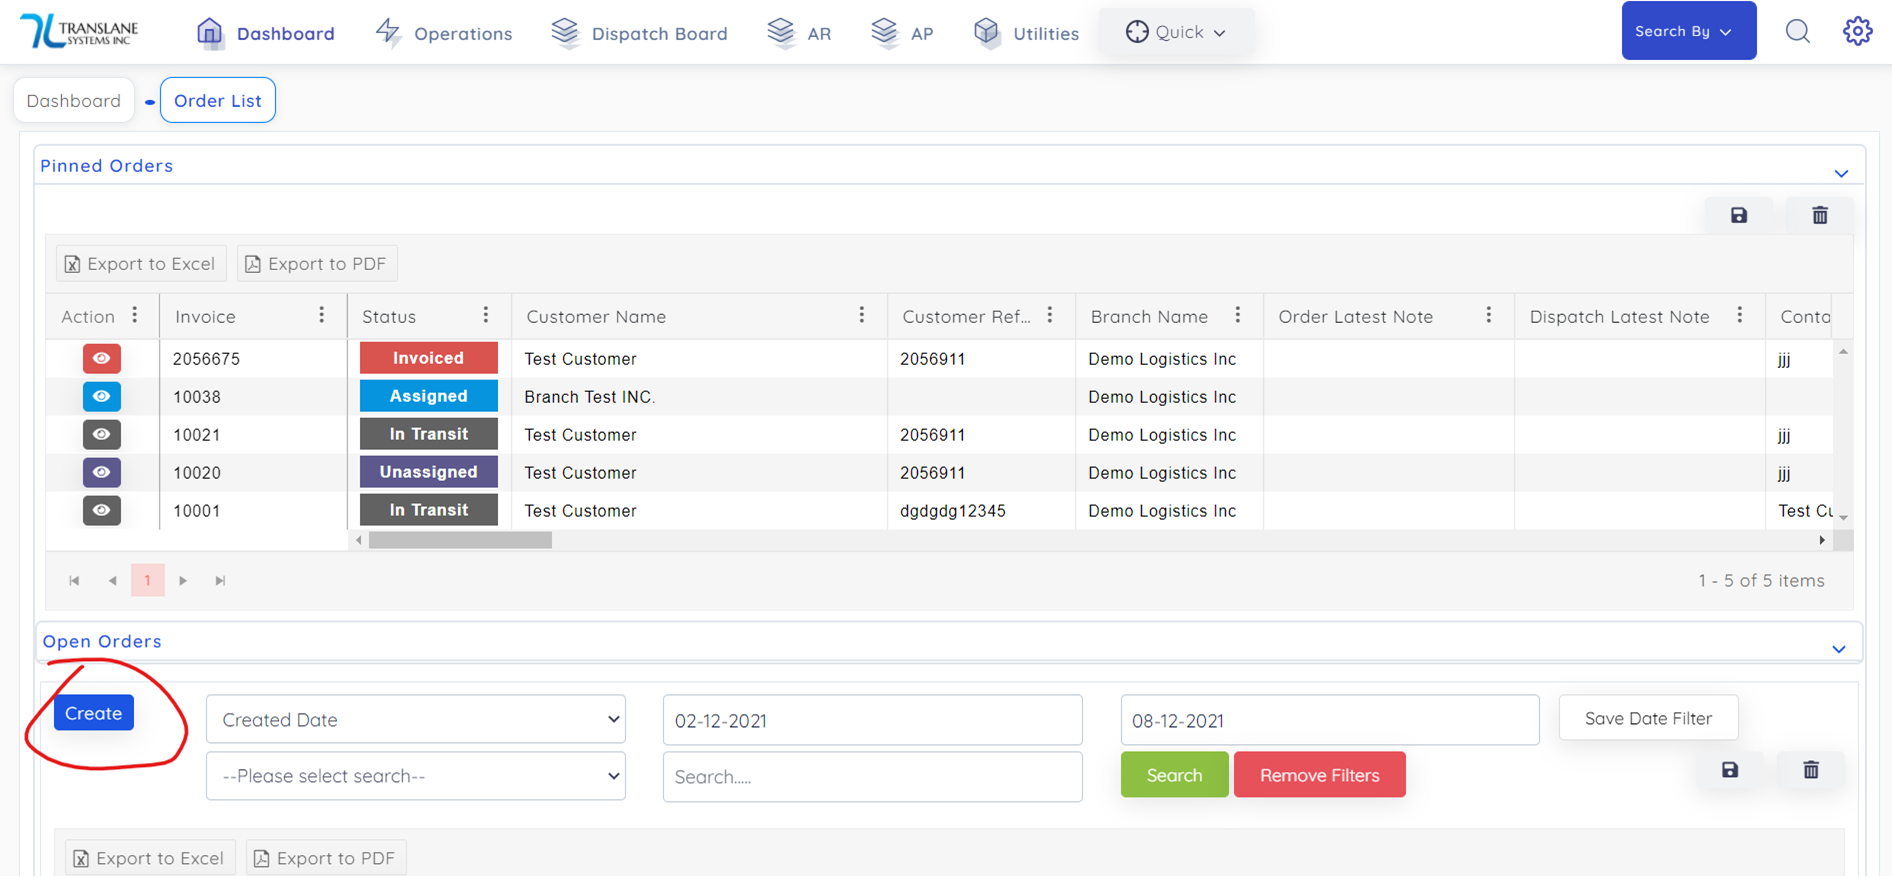
 Secondly from Orders List:
Then below is the first step to create an Order:
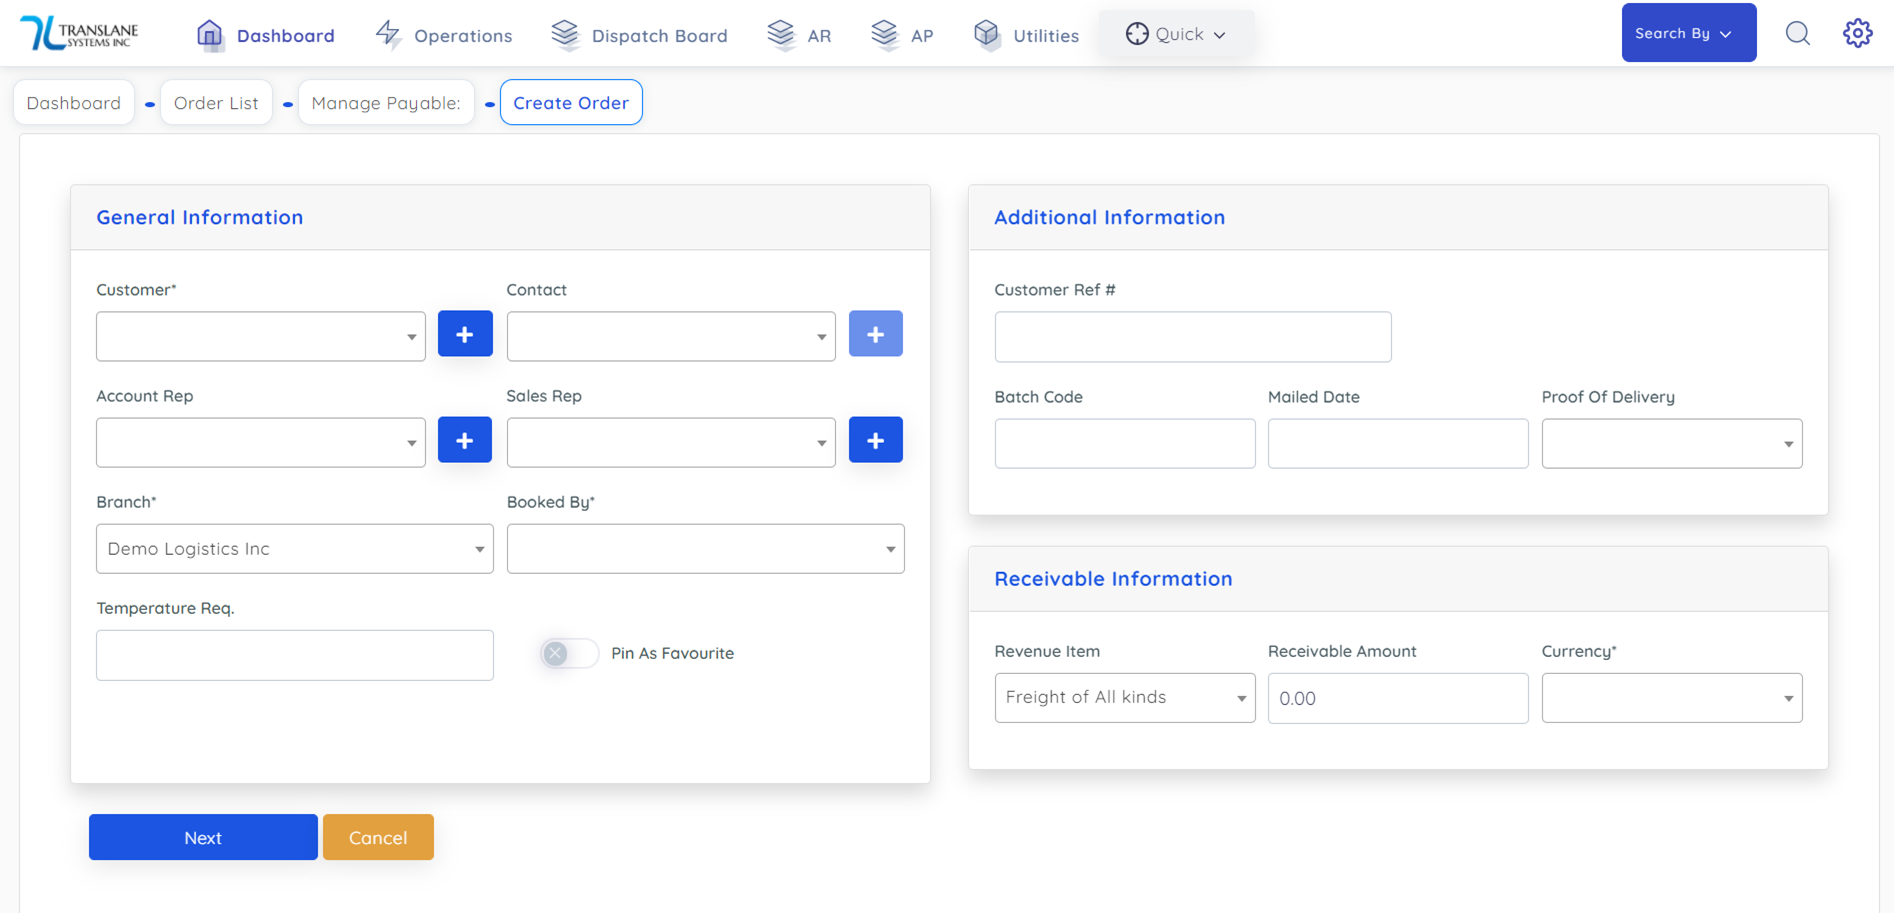
On above screen user need to select Customer, Customer's Contact person, Customer Ref# (Order number provided by customer) etc.
This is how order looks after create an Order:
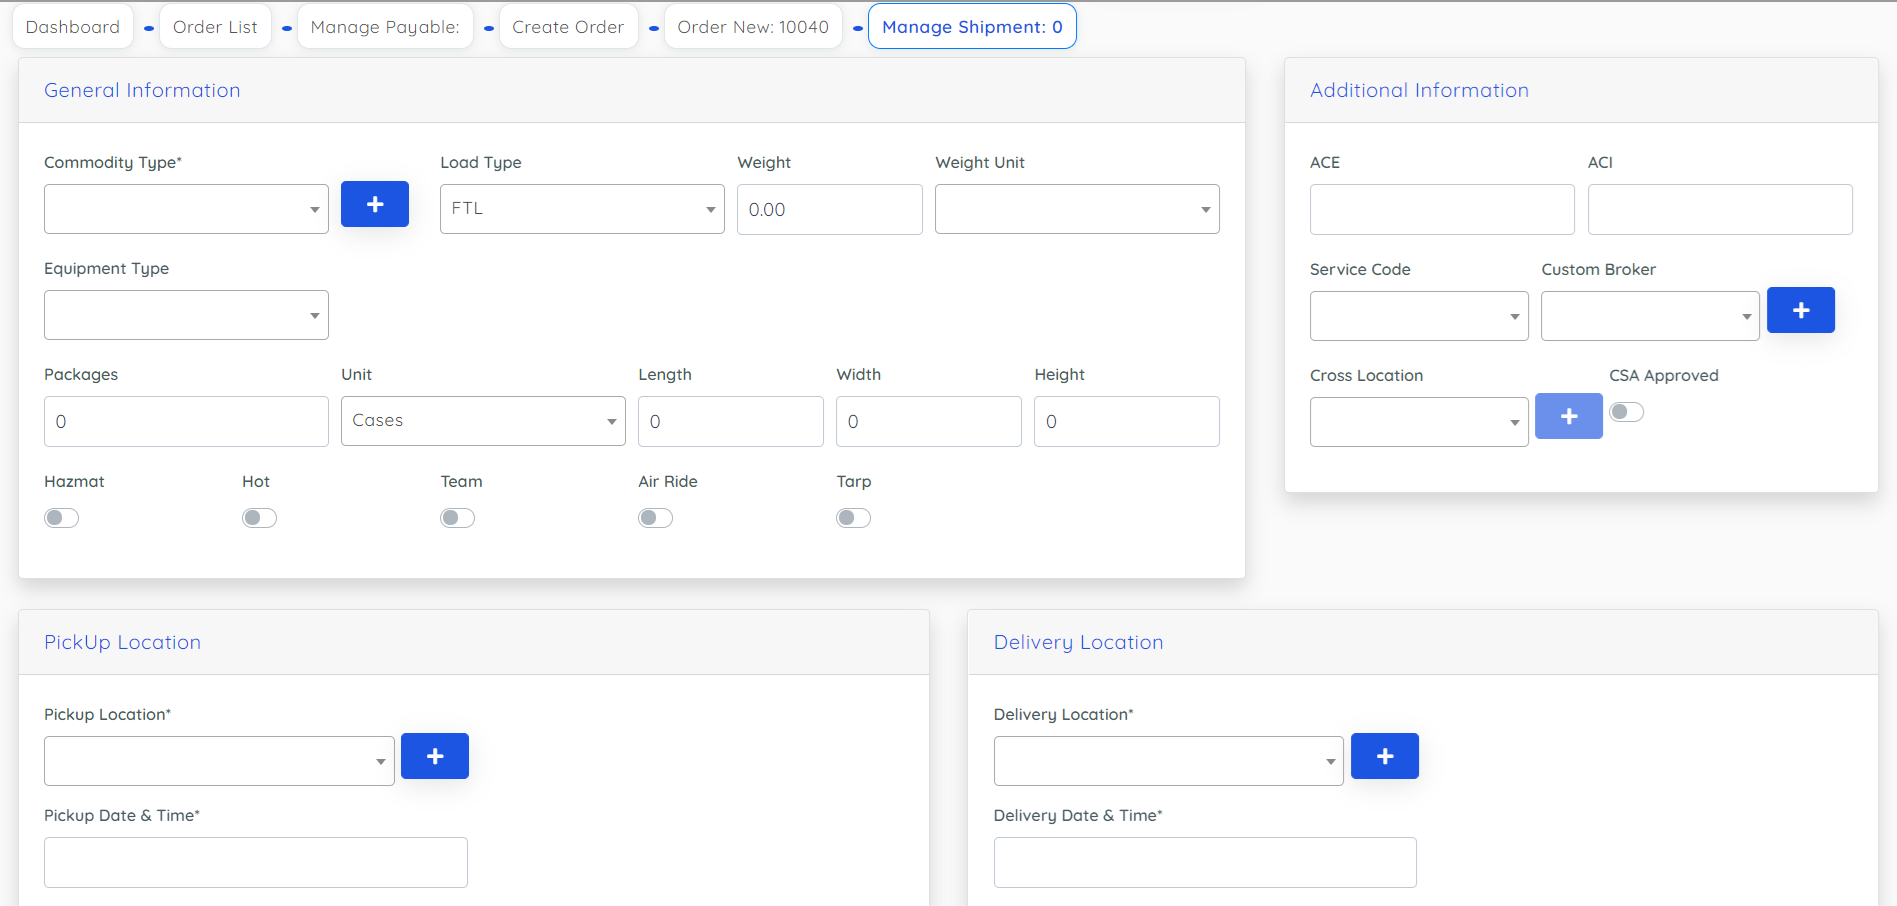
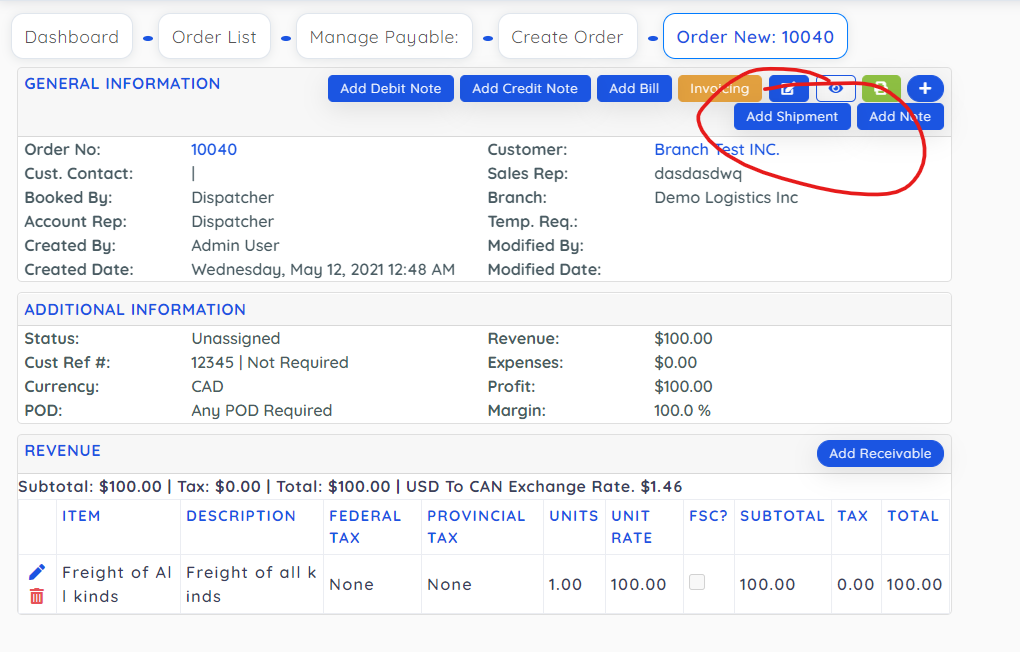 Next step is to add shipments to the order from below screen and here user need to add all shipments with pickup and delivery location combination:
This is how it looks after adding shipment to Order:
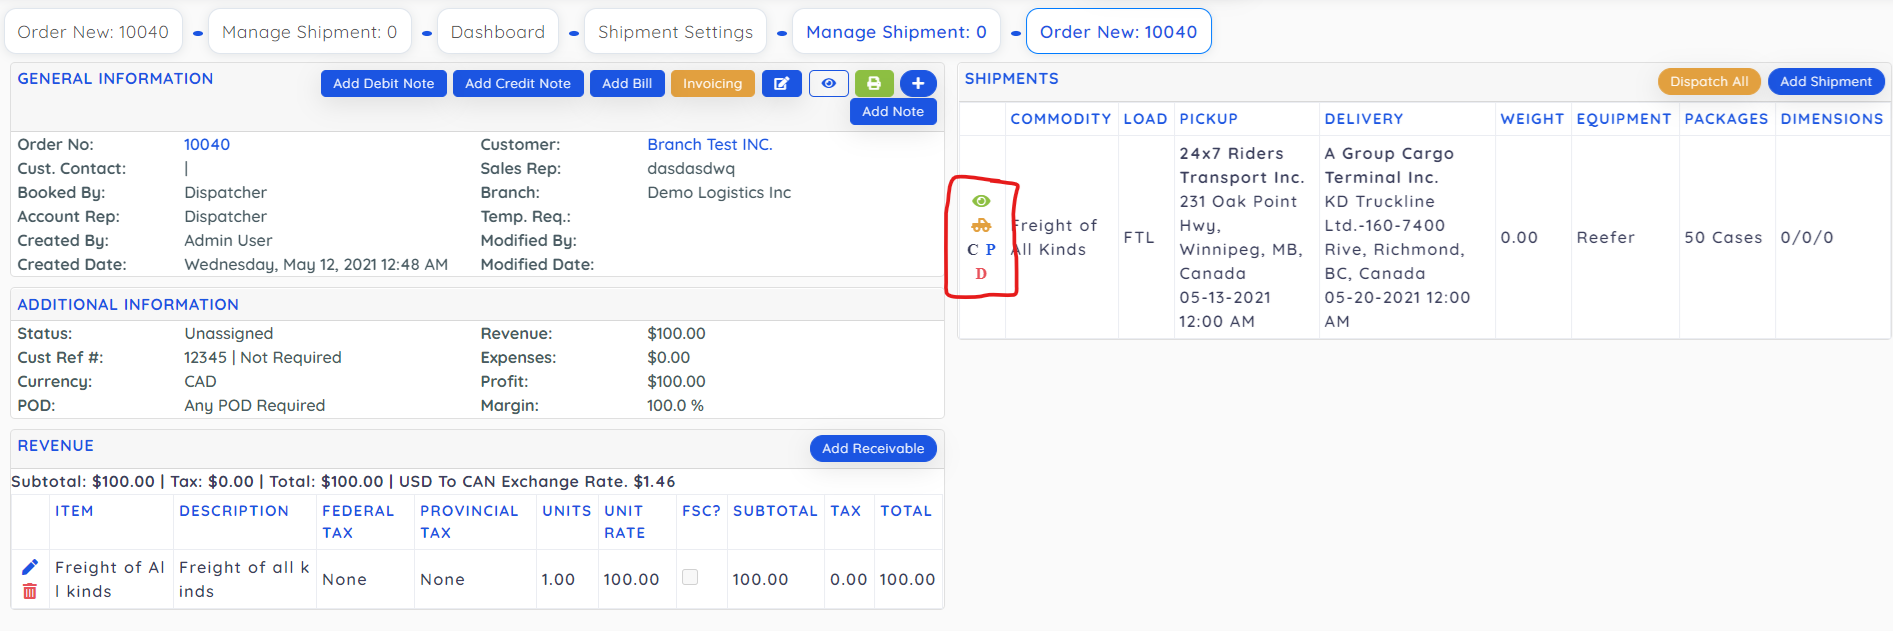
Now we have icons on shipments as per above screen,
first is eye icon to view full shipment detail,
second truck icon is used to dispatch that particular shipment,
C icon is used to copy and create a duplicate shipment under this order,
P icon is used to create another pickup for this shipment
D is used to create another delivery location.
This is how it looks if we add another delivery:
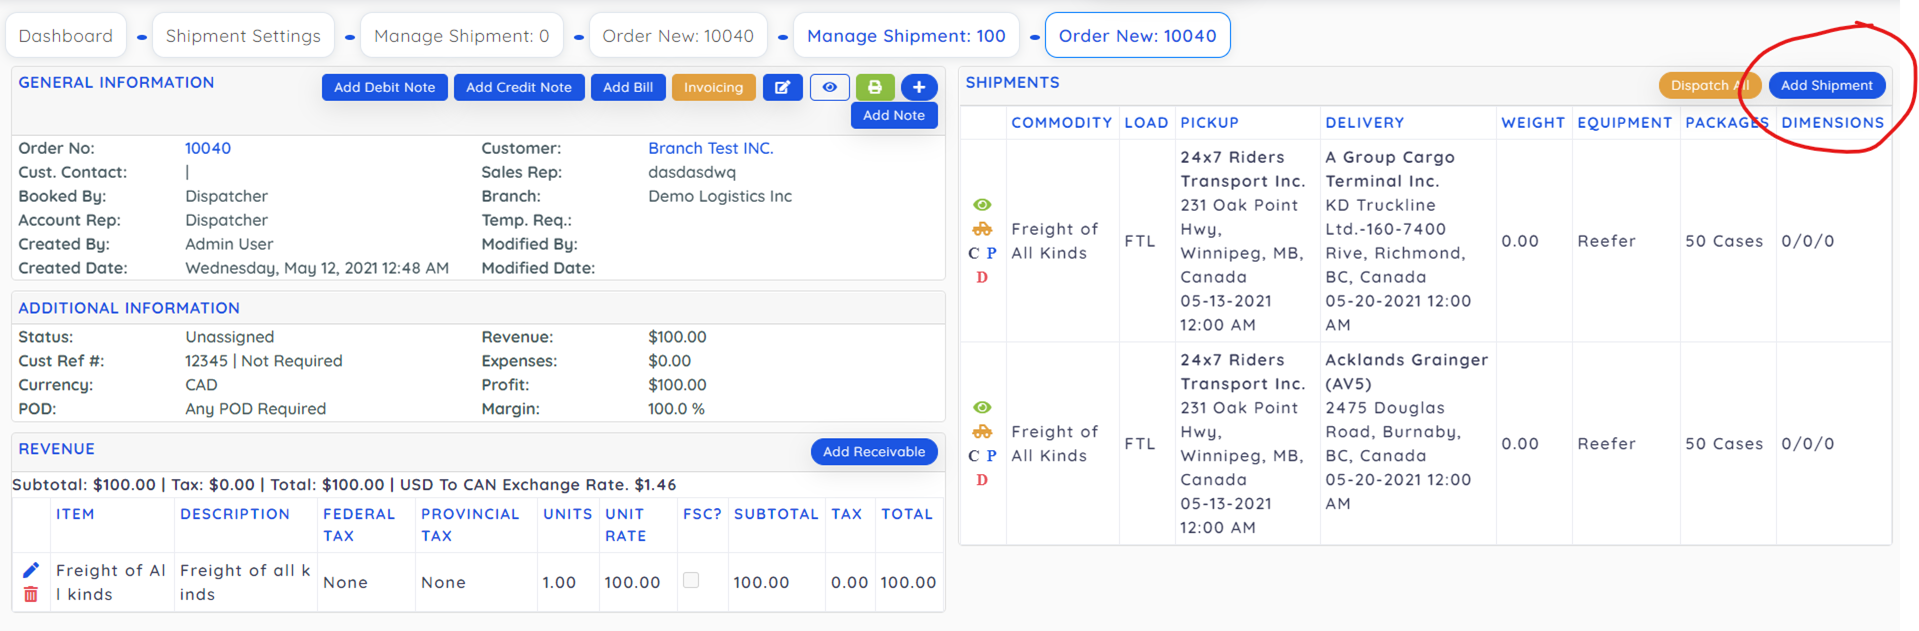
If you want to add another fresh shipment then user can use above marked icon.
Now create one Dispatch for all shipments then user can do so by click on Dispatch All, and if user want to create different dispatches for both the shipment then that can done by click of truck icon on individual shipment.
Once you click on Dispatch then it asks if you want to create a new dispatch or if you want to add shipment to an existing dispatch so driver can pick his existing load as well as this new one all together in one trip.
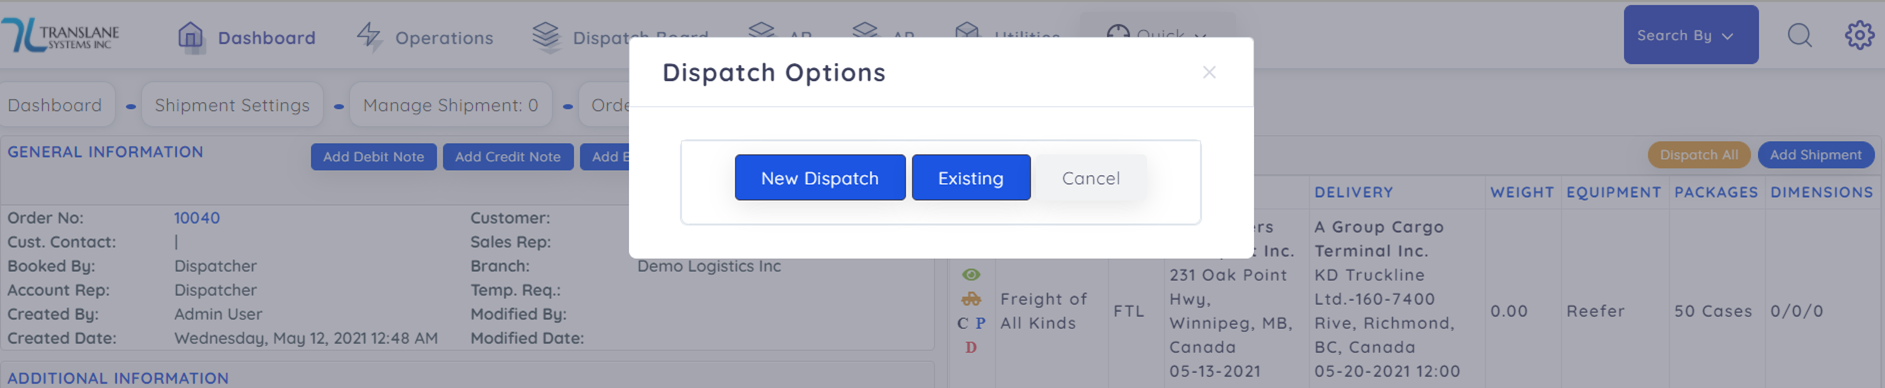 On create of new dispatch it asks for there option weather this dispatch is being done by a broker carrier or if company truck is pulling it or if its undecided then you can created dispatch with Unassigned status:
If you select a carrier then screen will look like below:
Here it will create a Bill against the carrier if carrier rate is more than zero. It will be linked to this dispatch, and its Order as well. Also if you change carrier using edit dispatch option then also it will create a new bill.
This is how the dispatch looks like:
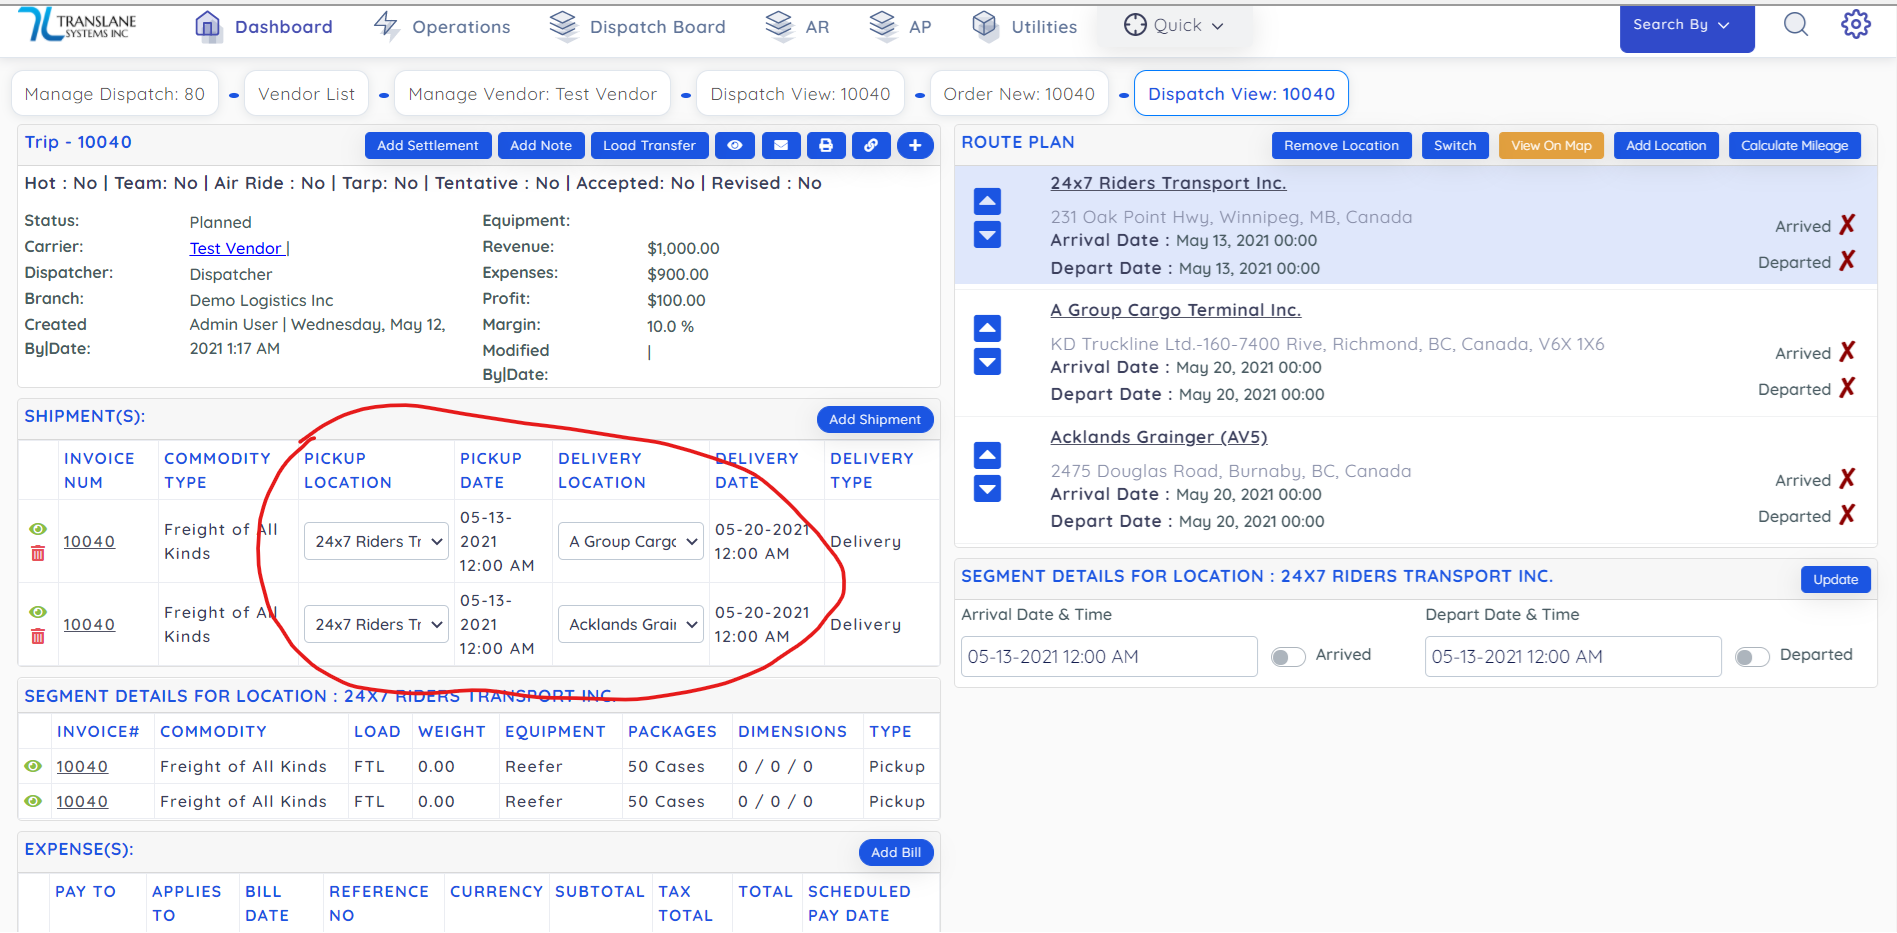
Here you can use arrow icons under route plan if you want to change route sequence.
And you can use shipments section to chose first pickup and delivery location and so on.
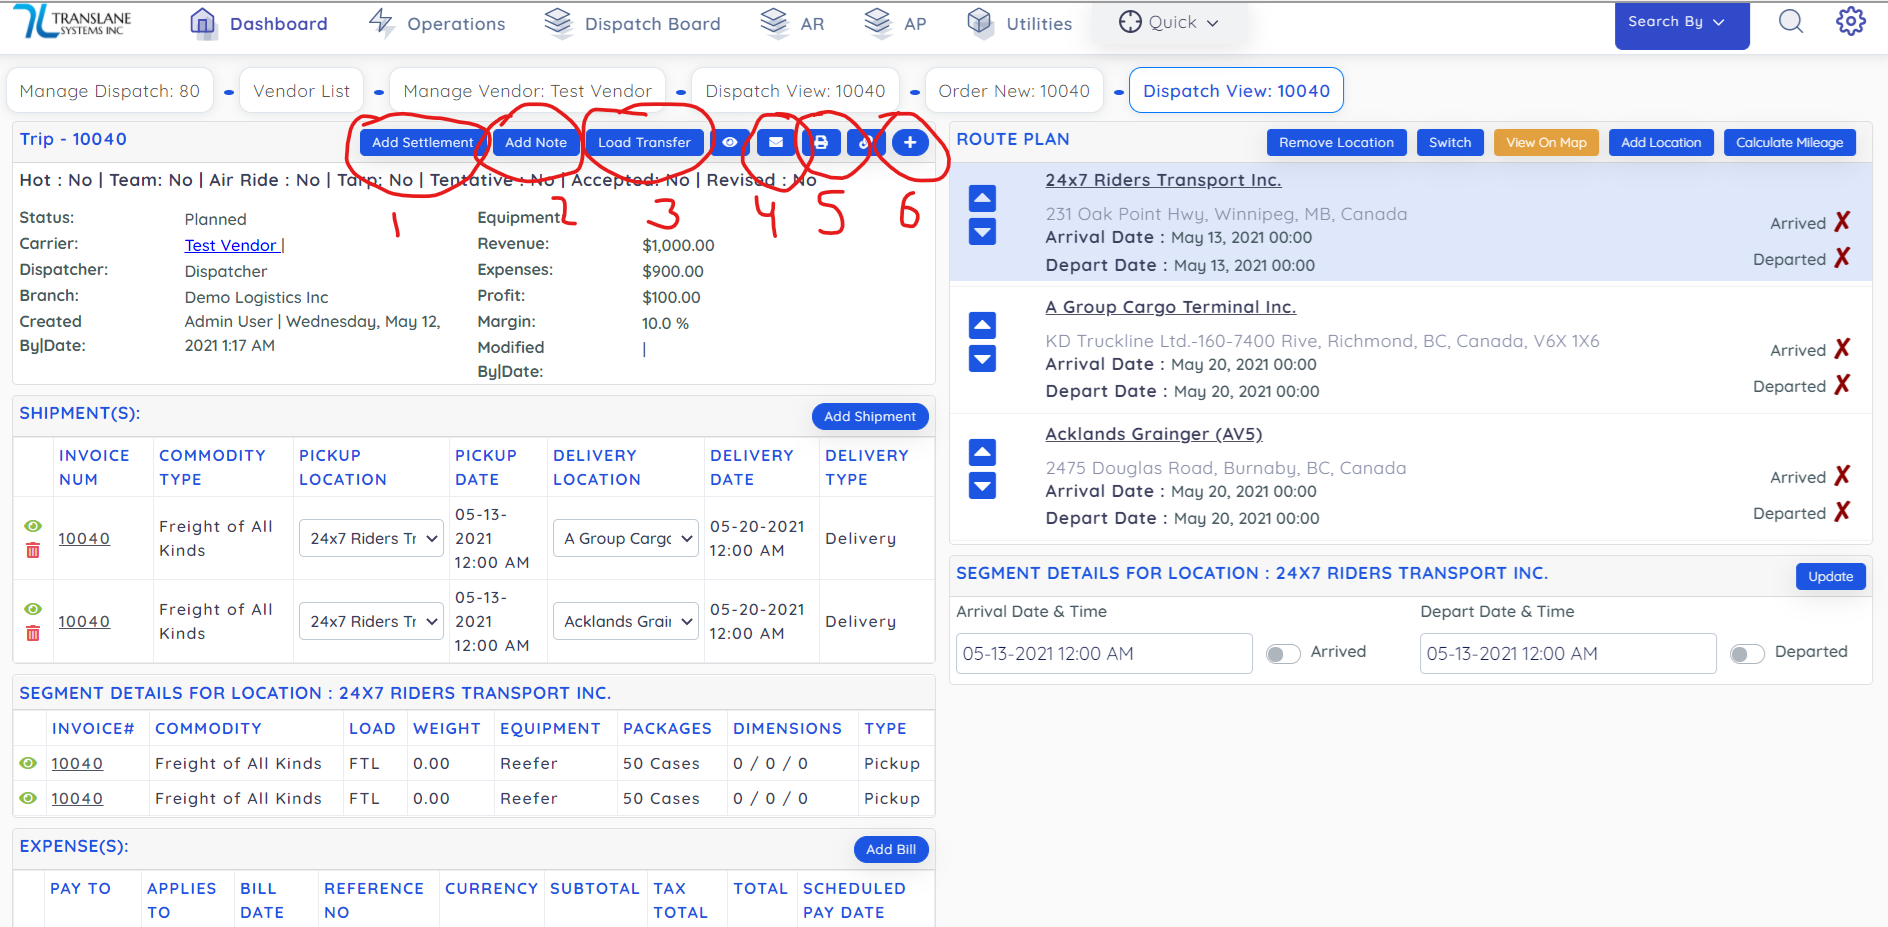
- Add settlement is used to create settlement for Driver/Carrier/Equipment/OwnerOperator by miles/hours/percentage/fixed amount.
- You can add various notes against dispatch regarding POD, tracking note etc.
- Load transfer is used to transfer the dispatch to a broker carrier if he is also using translane and the carrier do not need to manually create a new order, it will be created on his approval selection.
- Message icon is used to send a text message with dispatch details to a driver or carrier.
- Print icon is used to print the load confirmation or email it.
- Plus icon has more option such as to delete dispatch etc.
You can add any other bills/expenses/payables related to this dispatch such as truck repair etc from below button:

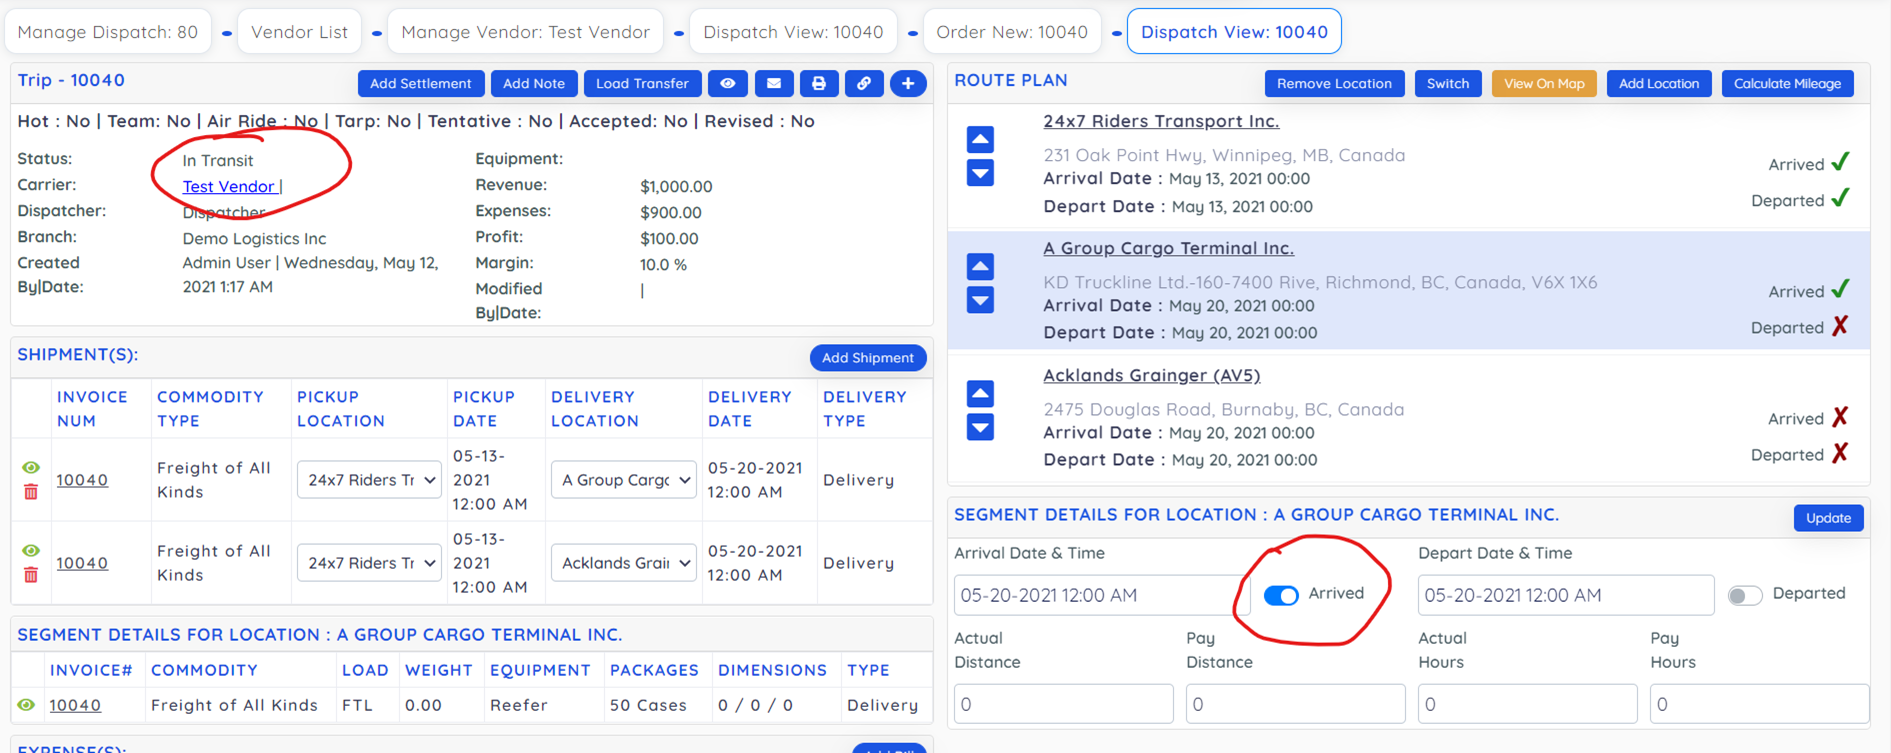
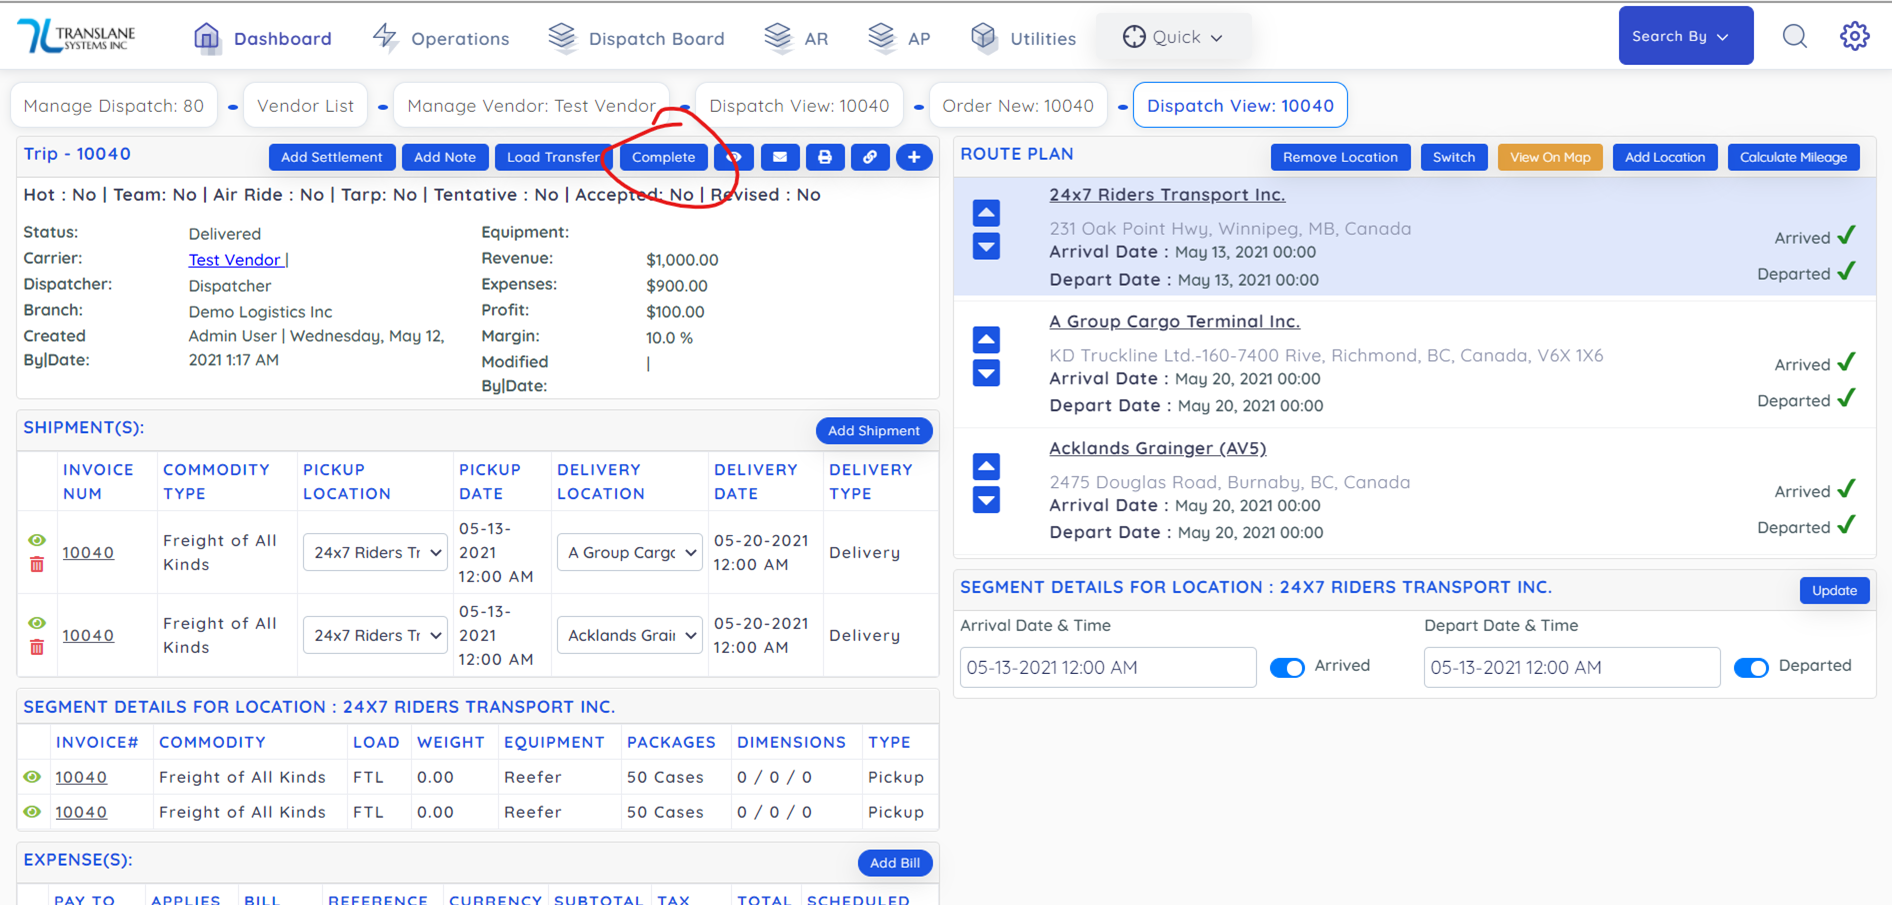
Then you can select a particular location in route plan and mark it arrived or departed for proper dispatch tracing, also it will change status of dispatch to In transit and its status will be marked delivered if all locations are delivered. And then you will be able to Complete the Dispatch. And once you complete the dispatch then its order will be automatically sent to invoicing for review and Post of Invoice by your Account representative.
Button to mark it complete:
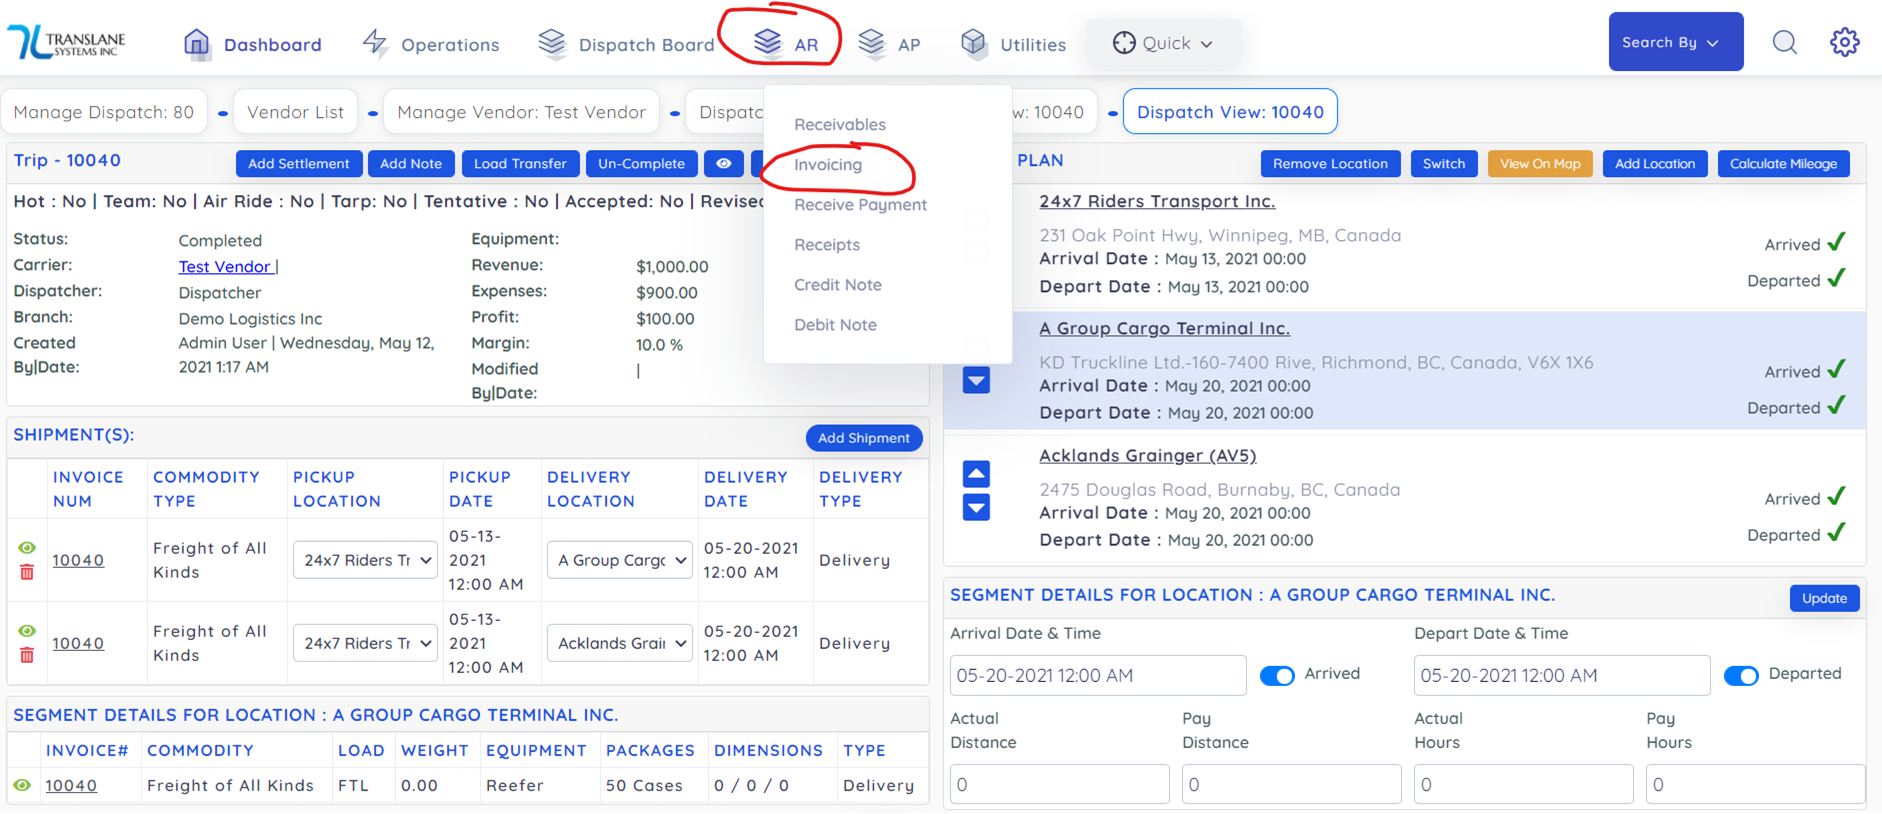
Once complete its Order will eb send to invoice and you can view it from link:
Then you can mark it approved and post it. Only Post will consider it mark as Invoiced to Customer.
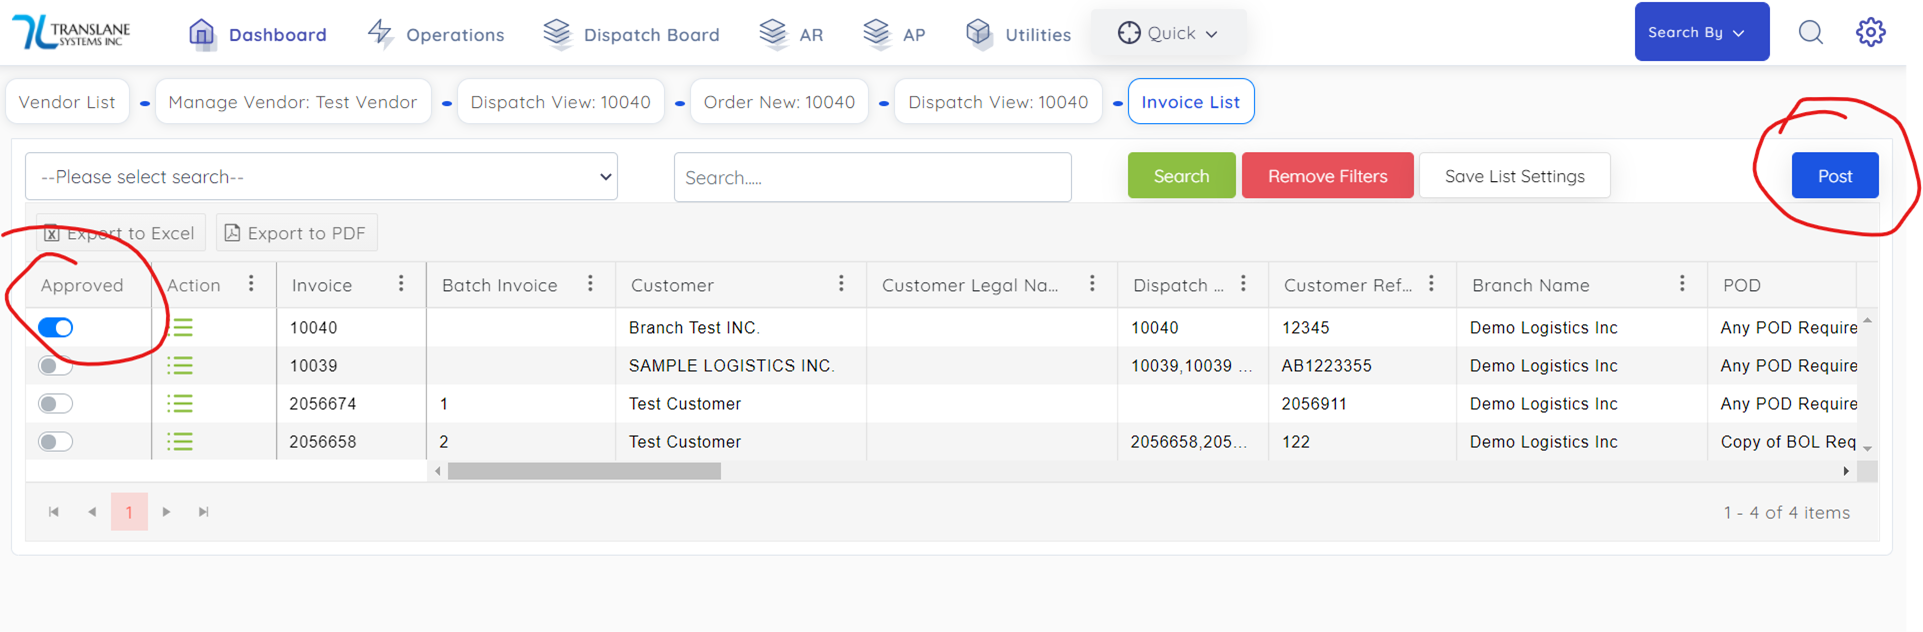
Then you can go to Order and print invoice or email invoice to Customer.
You can ask any other questions at support@skyhightechnologies.ca